Platform Super Admin guide
Sign in on your platform hostname with the Platform Super Admin password created during the applicable installer account or owner activation flow. This panel controls the SaaS business. Each subscriber’s Hyper-POS data lives in that subscriber’s separate workspace.
Your first login checklist
- Open Settings
Set the platform name/logo, currency display, timezone, default workspace values and sender email.
- Secure the account
Set a unique password, review active sessions and enable support-access authenticator verification if you will use temporary support access. Save recovery codes privately.
- Configure payment gateways
Use Settings → Gateways to enter sandbox credentials, copy the exact webhook URL shown for the saved credential revision and test callback handling. POS cashier gateways remain separate.
- Create and test a plan
Create a draft, set price/interval/trial/limits, connect a recurring gateway price when using automatic renewal, then publish after the gateway is verified.
- Create a test workspace
Complete the entire customer signup, setup, invitation, POS login, billing, support and recovery checks before accepting real subscribers.
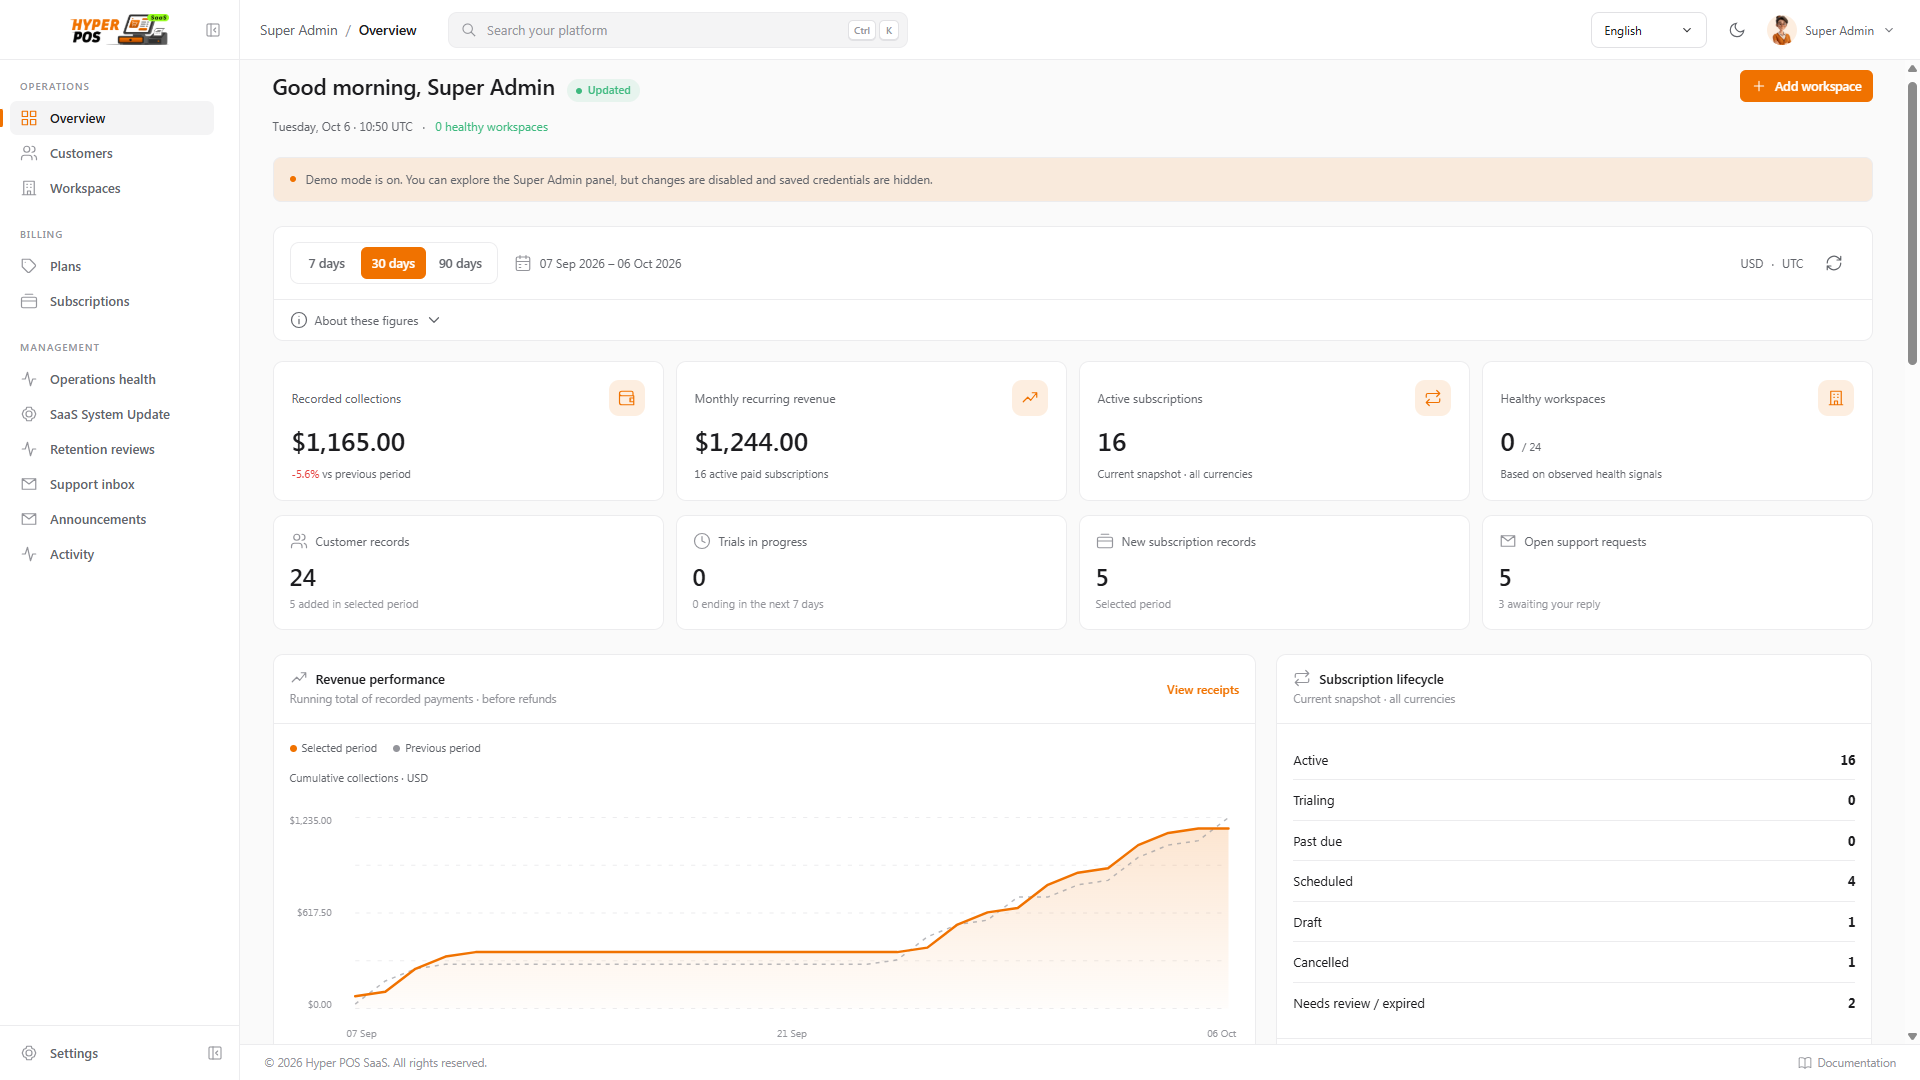
What each menu is for
| Menu | Use it for | Typical action |
|---|---|---|
| Dashboard | Platform totals, revenue period, trials, workspace health and items needing attention. | Switch 7/30/90-day view and open the pending workspace queue. |
| Customers | The people or companies who subscribe. | Add a customer, review contact details, open associated workspaces or archive unused records. |
| Workspaces | Each isolated Hyper-POS installation. | Create or open a workspace, complete hosting setup, review access, owner, subscription, activity and support history. |
| Plans | Prices, intervals, trials and feature/usage limits. | Save a draft, connect gateway billing if needed, publish an immutable version or unpublish new sales. |
| Subscriptions | A workspace’s current and historical plan terms. | Review status, start/end dates, renewals, refunds and billing receipts. |
| Operations | Host and workspace health, backup/recovery readiness and release observations. | Investigate stale cron/queue signals or failed workspaces. |
| System Update | Verify and queue a signed central delivery. | Upload the signed ZIP after host trust is configured; review host processing status. |
| Retention Reviews | Reviewed data-retention, export and deletion workflow. | Review legal hold, send notice and prepare a verified retention decision. |
| Support Requests | Subscriber support conversations. | Filter by workspace/status, reply and resolve a ticket. |
| Announcements | Platform messages to subscribers. | Draft, target, publish and review notices. |
| Activity | Platform audit events. | Review who changed important records and when. |
| Settings | Branding, gateways, currency, defaults, email, account and security. | Complete the first-login settings and revisit them after operational changes. |
Dashboard
The dashboard shows collections, monthly recurring revenue, active subscriptions, healthy workspaces, customer count and trials. Use the 7, 30 or 90 day controls; if multiple currencies exist, select one currency before comparing monetary totals. Open a workspace from the attention queue to continue setup. A healthy count needs recent verified runtime evidence; a newly planned workspace is not healthy merely because it has a record.
Customers
- Create a customer
Select Customers → New customer, enter the required identity/contact information and save.
- Review before assigning a workspace
Confirm the email and business name. A customer record alone does not create a POS or grant access.
- Edit or archive carefully
Update contact information as needed. Archive a customer only after its workspaces are archived or otherwise handled.
Workspaces
- Create or open a workspace
Select an eligible customer and a published plan. Review the plan snapshot before saving; drafts cannot be assigned.
- Complete setup
Open Setup. On shared hosting, create/verify the requested subdomain and empty dedicated database first. On VPS, review the automatic allocation and progress.
- Activate owner and test POS
After publication and Ready, use the owner credentials entered during manual activation or complete the subscriber activation link when that journey supplies one. Use Open POS and test a normal operation.
- Use detail tabs
Review Overview, Setup, Subscription, Activity and Support history. Check signed entitlement and access state before changing a limit or subscription.
Use temporary limit overrides only for a documented support reason and the exact expiry shown by the form. Do not share a workspace database, APP_KEY or private files with another subscriber.
For every field and the exact shared-hosting activation sequence, follow Create and activate a workspace from Super Admin. It covers customer eligibility, slug rules, subscription access, manual domain/database approval, first owner/store fields, cron and publication.
Plans
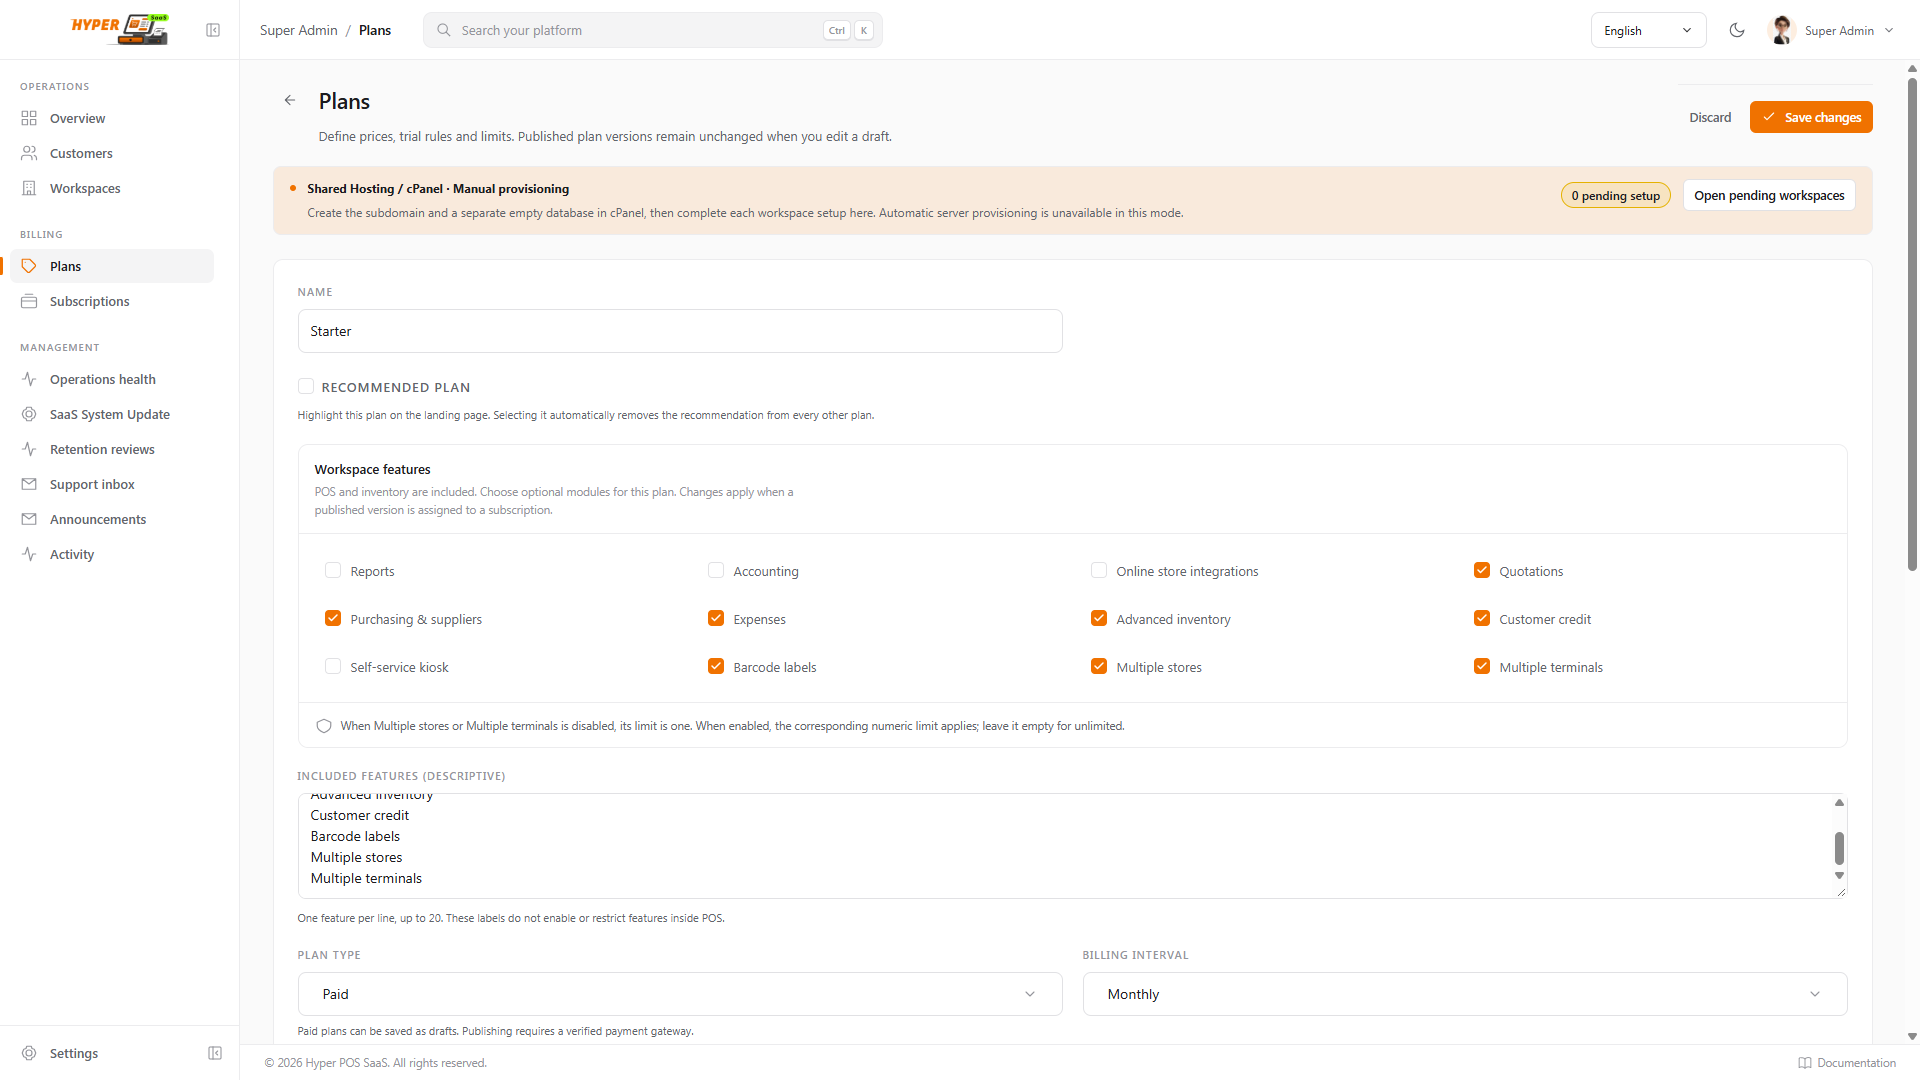
Start with a draft. Choose the base currency, price, billing period, trial rules, payment collection method and included features/limits. For Manual renewal, the subscriber pays again each period. For Automatic renewal, connect the exact recurring gateway price/plan ID and complete provider verification before publication. Publishing records an immutable version: later draft changes do not rewrite existing subscriber terms. Unpublishing stops new signups/renewals but does not instantly remove an existing subscriber’s paid access.
Subscriptions and refunds
Open a subscription to review its workspace, plan snapshot, billing method, dates, payment status and history. Use only the available lifecycle actions for the current state. A browser payment return does not by itself prove payment; wait for a verified provider receipt/webhook. For a refund, use the recorded payment and provider refund flow, then confirm the refund receipt and the resulting access decision. Do not manually mark a charge refunded merely because money was sent outside the gateway.
Settings
| Settings tab | What to set |
|---|---|
| Gateways | Platform subscription credentials and webhooks; test mode first. Subscriber POS payment settings are separate. |
| Platform | Brand name, logo and customer-facing platform identity. |
| Currency | Base currency and amount display format. Display changes do not convert stored prices. |
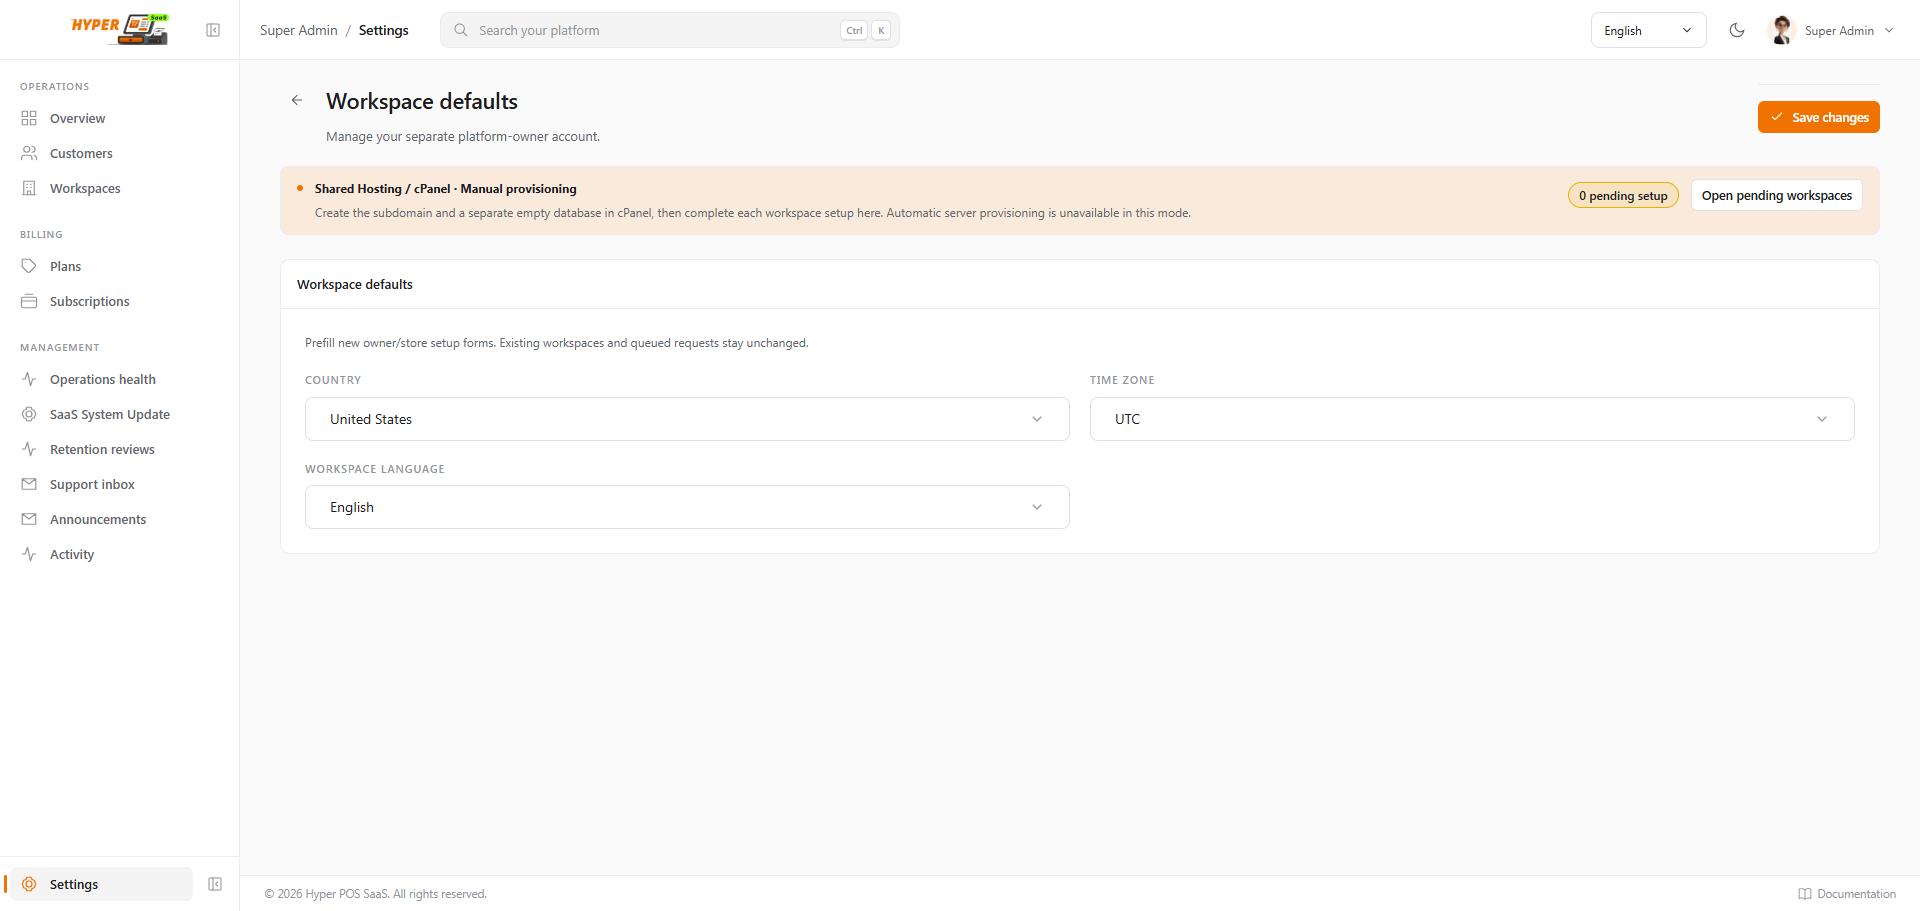
| Defaults | Prefill values for new workspace owner/store setup; existing workspaces do not change. |
| Sender and notification preferences; confirm real SMTP delivery. | |
| Account | Review the Platform Super Admin name and email. |
| Security | Change password, review/revoke sessions, and configure support MFA. |
Read-only Super Admin demo
For a public demonstration installation, set PLATFORM_DEMO_MODE=true in the SaaS platform application’s private .env file. Existing Super Admin credentials can still sign in and browse. The panel shows a demo notice, disables change controls, rejects change requests on the server, and hides saved gateway credentials, webhook details, provider mapping identifiers, and one-time support secrets. Set the value to false for a normal customer installation. Demo mode does not create sample data or reset records.
Daily administration and subscriber use
- Check pending work and health
Review Dashboard and Operations, then open affected workspaces. Distinguish setup progress, publication, subscription access and recent applied runtime evidence.
- Handle subscriptions through their actual billing method
Manual renewal requires another verified payment each period; automatic renewal depends on the gateway’s verified recurring flow. Do not infer paid access from browser return. Use the recorded receipt and supported lifecycle/refund controls.
- Review support and notices
Handle Support Requests and Announcements using workspace/plan targeting. Temporary support access requires its own authorized, expiring session and configured MFA. A Super Admin login is not a subscriber POS login.
- Review limits and data lifecycle
Use reasoned, expiring overrides when needed. Confirm usage before lowering limits. Suspension changes access; archiving, retention review and deletion have separate prerequisites.
- Maintain recoverability
Review backup evidence, signed update compatibility, individual workspace receipts and the restore procedure before updating live workspaces.
Subscribers work in their own POS stores and manage billing from the subscriber portal or eligible Subscription → Renew / Manage billing action. Workspace POS payment gateways and platform subscription gateways are configured independently.
Where to go next
Use Operations, updates & support for day-to-day monitoring and recovery, and Add subscribers for the full workspace setup journey.