Add SaaS to an existing Hyper-POS installation
Install the compatible optional plugin, prove control of the current installation, and set up the separate SaaS platform. Your original Hyper-POS business keeps its database and files. The plugin setup and a full existing-business import are different procedures.
The add-on opens owner verification and guided platform setup. It does not automatically import products, sales, balances, stock, users or uploads into a subscriber workspace. Complete business import/cutover still needs a separately reviewed and accepted procedure. Keep the original store operational until that procedure is approved.
1. Confirm compatibility and prepare backups
| Requirement | Current source / action |
|---|---|
| Hyper-POS core | Current plugin.json: exactly 1.1.3 (=1.1.3). Check your installed version and the downloaded package manifest; other releases may have different requirements. Resolve a mismatch using the official compatible release. |
| PHP | Manifest: >=8.3 <9.0. Check both web PHP and CLI/cron PHP plus the extensions required by the supplied runtime. |
| Release status | The builder produces a preview unless valid production approval is supplied. Check release-status.json, signatures and publisher pin; native hosting acceptance is still pending in the current source. |
| Source owner | An eligible active, verified Hyper-POS Super Admin account, its current password, registered purchase information and access to the hosting file manager. Account access alone is not ownership proof. |
| Backups | Save the database, full application/plugins, private .env, storage/app and any existing public/uploads. Preserve secrets privately and verify restore on an isolated copy. Include current jobs/scheduler configuration. |
| Hosting | A separate platform hostname/database/private root, subscriber base domain, HTTPS, supported PHP, SMTP and the required scheduler/runner. cPanel and VPS use different provisioning steps. |
Example: keep pos.example.com as the original business, use platform.example.com for SaaS administration and shops.example.com as the subscriber base. Do not repoint the source domain or reuse its database for the new platform.
2. Install and enable the SaaS plugin
- Get the correct archive
Use the official compatible add-on ZIP with
plugin.jsonat its root. The add-on ZIP is not the larger signedcustomer-delivery.zipor separateplatform-release.zip. - Open Hyper-POS → Settings → Plugins
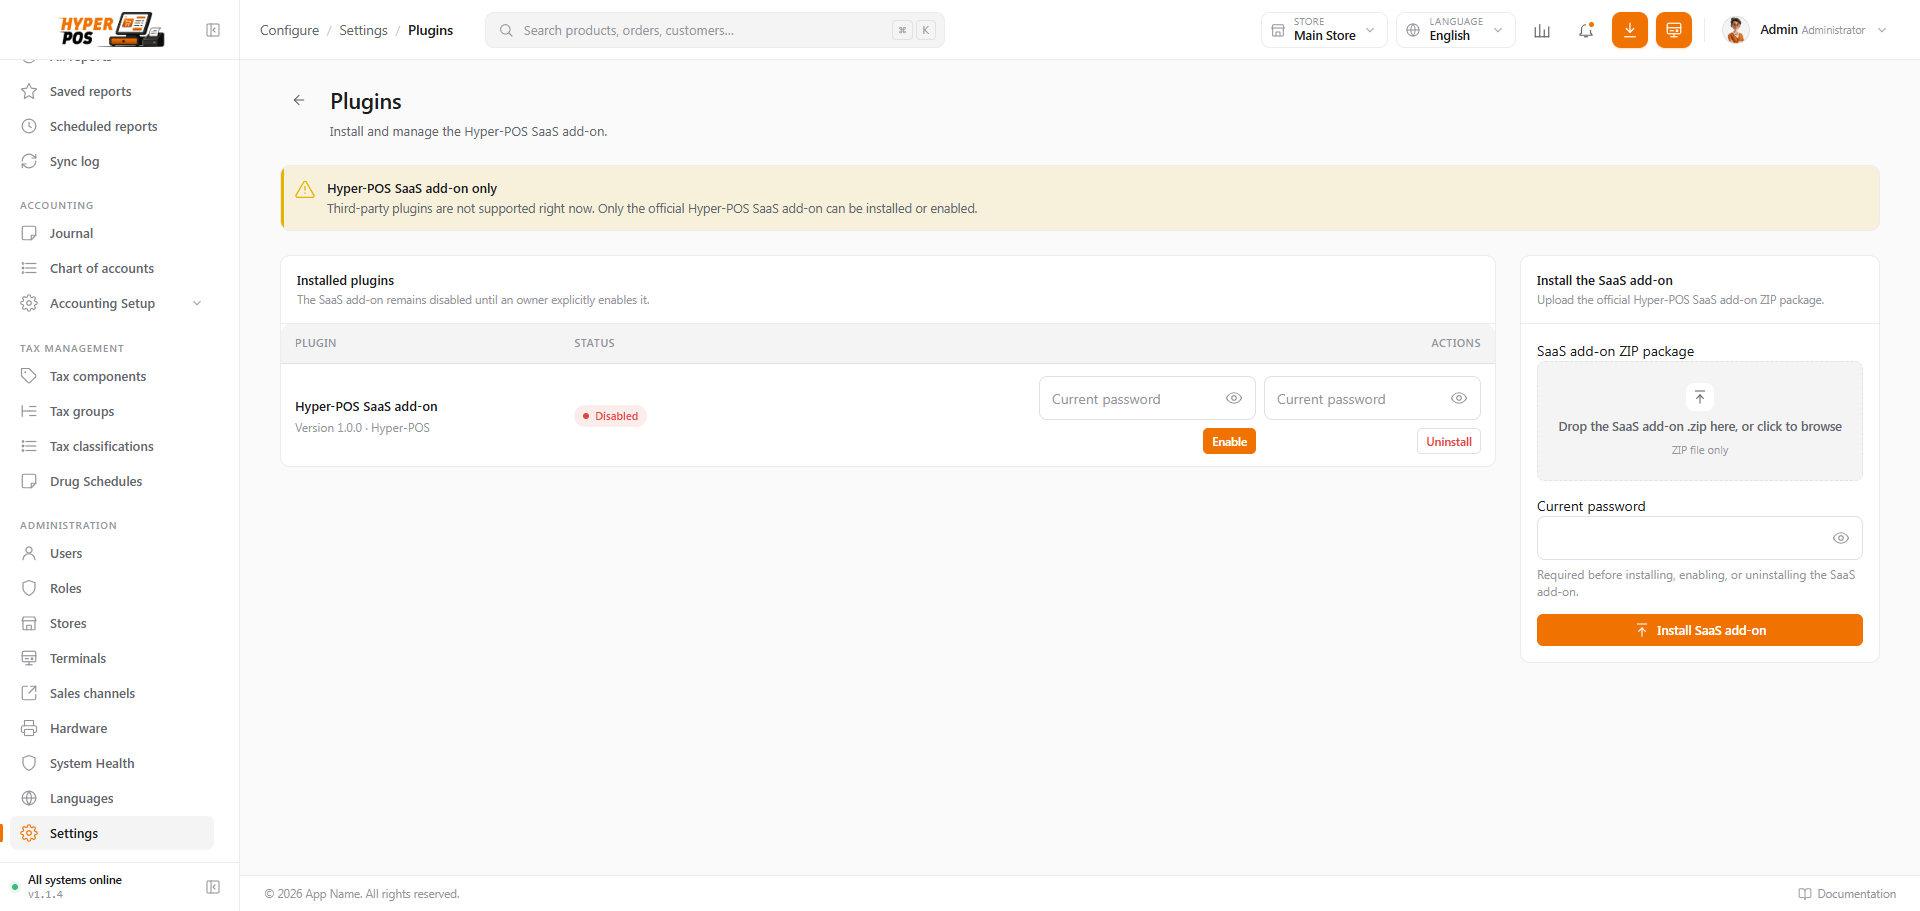
Select the add-on ZIP in Install a plugin, enter the current Hyper-POS password required by the form, and install. Check the reported plugin name/version and compatibility.
- Enable and configure
Select Enable, complete the password/confirmation controls offered by the manager, then Configure. The settings entry opens
/admin/addons/saasunder the original Hyper-POS login.
If Plugins is hidden or inaccessible, confirm that you are the authorized Super Admin and that the core release exposes the plugin manager. A technical operator should inspect visibility/permissions rather than grant ordinary staff owner access. Existing plugin folders must be managed through the official lifecycle/update process.
3. Verify purchase and server ownership
- Start the ownership challenge
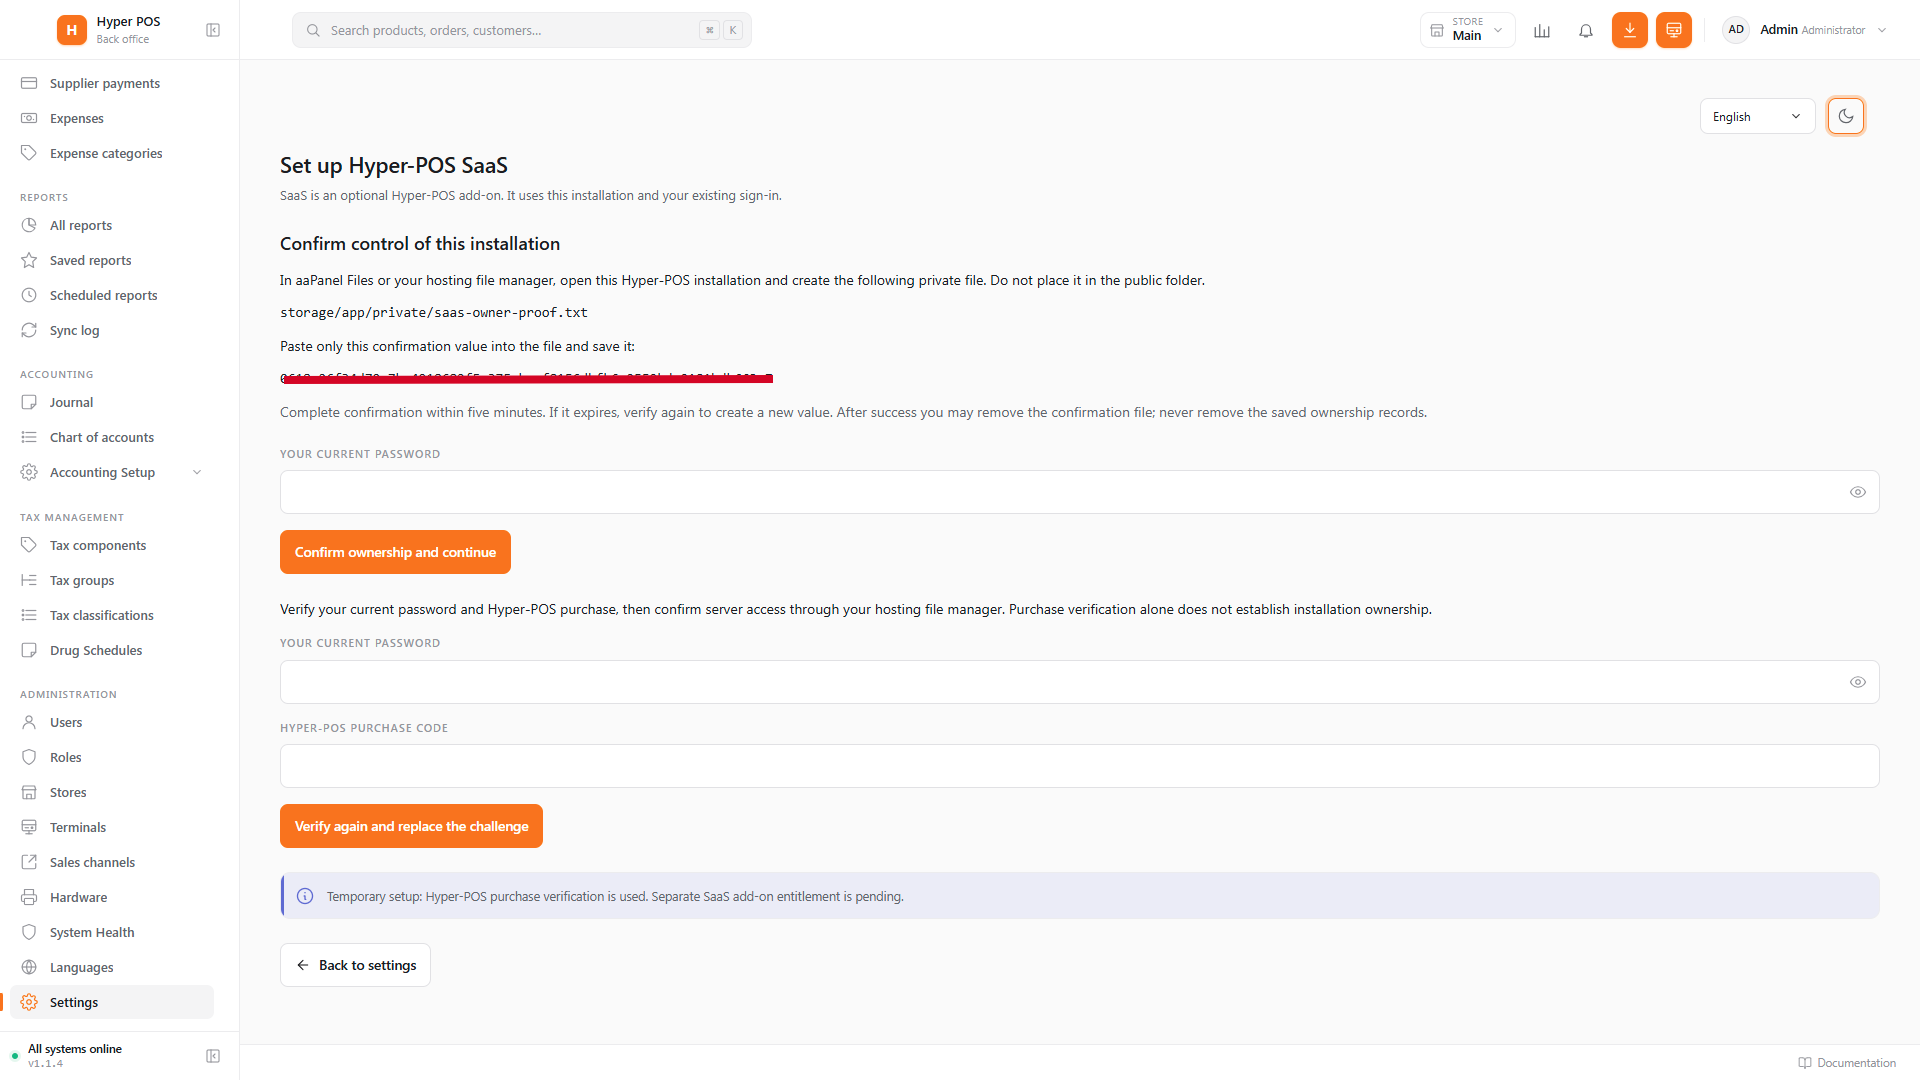
Enter your current Hyper-POS password and the configured core purchase code when requested. The current existing-owner implementation uses temporary core purchase verification; separate production SaaS entitlement depends on the release approval. Enter secrets only in the protected application form.
- Create the private proof file
Use the hosting file manager to create
storage/app/private/saas-owner-proof.txtinside this exact original installation. Paste only the displayed confirmation value. Keep it outside the public document root and do not use a symlink. - Confirm promptly
Return to the same login/session, re-enter your current Hyper-POS password and select Confirm ownership and continue. The challenge lasts five minutes; if expired, restart and replace the old value.
- Continue to guided setup
The verified owner proceeds to
/operator/setup. The immutable owner binding does not itself grant Platform Super Admin or provision workspaces.
The flow checks the configured HTTPS URL, account eligibility, purchase verification, current password and independent server-file control. Changes to the owner identity, URL/key or damaged binding require the documented recovery path. Development purchase bypass flags are not a production setup instruction.
4. Complete the platform configuration
Choose the intended hosting mode in guided setup. The configuration form contains these fields:
| Field | Example | Explanation |
|---|---|---|
| Hosting mode | Shared Hosting / cPanel — manual provisioning | Use shared_manual without a privileged runner; choose vps_automatic only on the configured supported root host. |
| Manual provisioning acknowledgement | Checked for shared hosting | Confirms that you will handle cPanel domain/database tasks. It is not evidence they are complete. |
| Platform domain | platform.example.com | Hostname only, without https:// or a URL path; distinct from subscriber/source hostnames. |
| Workspace domain | shops.example.com | Base used to form asha-retail.shops.example.com. |
| Advanced: platform database | shopacct_saas | Separate platform database name. The connection credentials/private release configuration are supplied by the deployment, not all by this short form. |
For the current existing-owner shared-hosting preview, a technical operator must supply the trusted runtime before installation can finish. The source configuration reads:
| Configuration key | Purpose |
|---|---|
| SAAS_SETUP_ARTIFACT_PATH / SAAS_SETUP_ARTIFACT_SHA256 | Private signed runtime artifact path and its verified SHA-256. These are release-specific operator values, not a public upload path. |
| SAAS_SHARED_PLATFORM_ROOT | Separate private platform application root; its public child is the platform document root. |
| SAAS_PLATFORM_DB_HOST / PORT / DATABASE / USERNAME / PASSWORD / SOCKET | Dedicated platform database connection. Do not replace the source business DB_* values or use its credentials by accident. |
Follow shared-hosting setup or VPS setup. Run the displayed preflight checks, SMTP verification and scheduler checks. Fix blockers before completing the reviewed setup. The existing-owner screen and gated fresh installer have different fields; use the guide for your actual entry path.
5. Install and activate Platform Super Admin
On the existing-owner shared flow, select Complete shared-hosting setup, then Install platform when offered. The browser advances bounded phases and retains progress after interruptions. The product installation may initialize its dedicated platform schema; opening a guide or configuration draft does not do so. Review this installation action with your technical operator.
- Verify completed setup
Wait for completion and the verified platform health result. If a phase needs attention, keep its journal and use the displayed Continue/Verify action after correcting the error.
- Activate the platform account
Use the owner activation invitation/Open activation action supplied by setup and create the separate Platform Super Admin password. If delivery fails, fix SMTP and use Resend invitation when offered.
- Sign in on the platform hostname
Check branding, currency, defaults, email, gateway settings, plans and Operations. The original POS owner login and platform login are separate.
- Create a test workspace
Follow the complete Super Admin workspace setup guide through database approval, initialization, publication and first POS login.
6. Verify the original business and new platform
- Original POS: confirm the same company/stores, users, product/stock totals, sales/finance records and uploaded files; verify normal login and scheduled work.
- Platform: verify HTTPS, separate identity/database, mail delivery, scheduler/queue health and correct hosting mode.
- Test workspace: confirm its own hostname, owner, store, database/files/sessions, limits, receipt and backup evidence.
- Confirm you have a tested rollback/restore plan before adding live subscribers. Installing a plugin alone does not prove a completed SaaS deployment.
Moving the existing business into SaaS
The import/portability tooling has read-only probes and reviewed stages, but the public conversion journey does not provide a verified automatic full-store cutover. A complete move must cover products, stock, sales, accounts, files, users, permissions, settings, plugin compatibility and encrypted values, followed by reconciliation and restore verification. Do not restore the source database over an initialized subscriber or copy APP_KEY/ciphertext between workspaces.
Until the matching release has completed native import/cutover acceptance, treat this as a separate operator-led procedure. Troubleshoot plugin/ownership/platform setup using the issue guide.